
Introduction
Sourdough baking is a rewarding yet sometimes frustrating endeavor. Many homebakers dream of pulling a beautifully crusty, airy, and flavorful loaf out of the oven, only to be met with dense, flat, or sticky dough that doesn’t behave as expected.
Unlike store-bought yeast, sourdough relies on a wild yeast culture (starter) to ferment and rise. Because of this natural fermentation, numerous factors can affect your loaf, including starter health, proofing time, dough hydration, flour type, and oven conditions.
If you’ve ever asked yourself, “Why is my sourdough so sticky?” or “Why didn’t my bread rise?”—you’re in the right place. This guide will troubleshoot the most common sourdough problems and provide practical solutions to help you perfect your baking skills.
Table of Contents
Frequently Asked Questions and Troubleshooting Tips
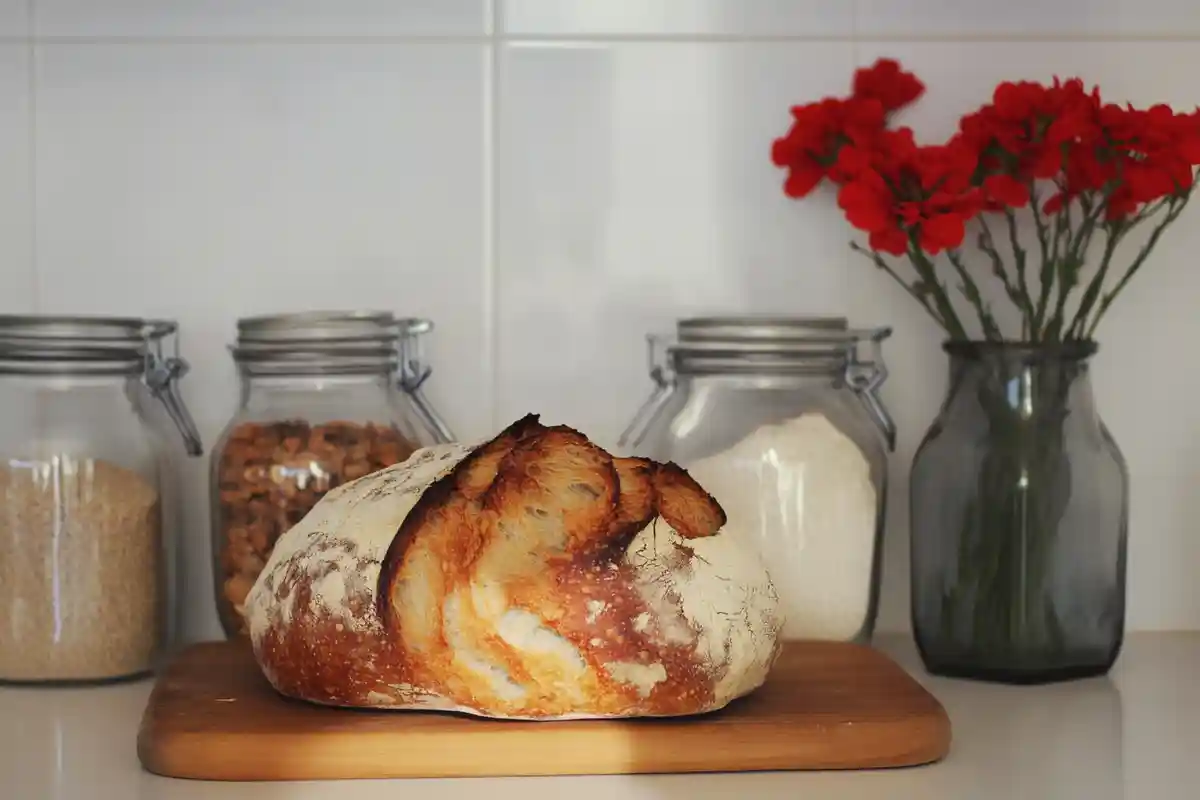
Issues with Getting an Ear on the Loaf
An “ear” is the raised flap of crust that forms on a properly scored sourdough loaf. This feature looks beautiful and contributes to an enhanced crispiness in the crust.
If your loaf is coming out with a smooth surface and lacks an ear, consider the following factors:
1. Sharp Razor for Scoring
Scoring your dough correctly allows for controlled expansion in the oven. A dull blade will drag through the dough rather than make a clean cut, preventing a proper rise.
Solution: Always use a sharp razor blade or a bread lame to make clean, precise cuts.
2. Scoring Technique Matters
The angle at which you score the dough also plays a role.
Solution: Hold the blade at a slight angle (about 30-45 degrees) instead of cutting straight down and make a single deep slash along one side of the dough. It encourages the crust to lift and form an ear.
3. Proper Proofing is Key
If the dough is overproofed, it loses strength and won’t expand as much in the oven.
Solution: Perform the poke test before baking—gently press the dough with your finger. If the indentation springs back slowly, it’s ready to bake. If it doesn’t spring back at all, it’s overproofed.
Sticky Dough: Why is My Dough So Wet?
Sticky dough is one of the most common complaints among sourdough bakers. While sourdough is naturally wetter than conventional bread dough, excessive stickiness can make handling difficult.

1. Wet Hands and Work Surface
Instead of adding too much flour (which can make the bread dense), try working with slightly wet hands and a damp work surface. It prevents the dough from clinging to your fingers.
2. Flour Type Affects Stickiness
Some flours absorb water better than others.
- Rye flour and whole wheat flour create stickier dough.
- Bread flour (high-protein) produces a stronger, less sticky dough.
If your dough is too wet, try adjusting the flour type or slightly reducing the water content in your recipe.
3. Salt Strengthens Dough
Salt tightens the gluten structure, making the dough more manageable. If you’ve reduced salt, your dough may be too slack and sticky.
Solution: Stick to the recommended 2% salt in your recipe (e.g., 10g salt for 500g flour).
Dense Loaf That Didn’t Rise
A dense, heavy loaf is usually caused by weak fermentation or an inactive starter.
1. Weak Starter
If your starter isn’t strong enough, it won’t provide the gas to make the bread rise.
Solution: Ensure your starter is active by feeding it at least twice a day leading up to baking. The float test can help—drop a spoonful of starter into water. If it floats, it’s ready!
2. Cold Environment Slows Fermentation
Fermentation will take much longer if your dough is in a cool kitchen (below 20°C/68°F).
Solution: Keep your dough warm (22-25°C/72-77°F), such as inside the oven with just the light on.
Flat Loaf with Honeycomb Texture (Overproofing)
If your sourdough spreads out instead of rising and has a honeycomb-like structure, it’s likely over proofed.
Signs of Overproofing:
- Dough collapses when scored.
- Loaf comes out flat instead of domed.
- Large, uneven air pockets inside the crumb.
How to Fix It:
- Reduce proofing time by 1-2 hours and see if it improves.
- Try bulk fermenting at a lower temperature to slow down fermentation.
Strengthening a Weak Starter
A strong starter is the foundation of great sourdough bread. If your starter is sluggish, try these tips:
- Feed Twice Daily with equal parts flour and water.
- Switch Flours—rye or whole wheat flour promotes better fermentation.
- Keep Warm (20-25°C/68-77°F). If your kitchen is too cold, fermentation will be slow.
- Discard More Starter—leaving just 1 tsp in the jar before feeding strengthens the culture.
Pro Tip: If you need a quick fix, add 1-2g of commercial yeast to your dough to help fermentation.
Starter Issues and How to Fix Them
Water on Top (Hooch)
- This liquid layer means your starter is hungry. Simply stir it back in or pour it off and feed again.
Moldy Starter
- Discard it! Mold can produce harmful toxins. Prevent mold by keeping utensils and jars clean and sterilized.
Neglected Starter
- If it has no mold, it can be revived. Take 1 tsp of starter, place it in a clean jar, and feed it twice daily until bubbly again.
Starter Not Rising
- Try changing flour brands, adding honey, or feeding with warm water to speed up fermentation.
Shaping a Loaf: How to Get a Good Structure
Proper shaping gives sourdough structure and strength.
- If your dough spreads too much, it might not be shaped tightly.
- Try using the coil fold or stretch-and-fold method to build dough tension.
- Here’s a video tutorial on shaping for better results.
Gluten-Free Sourdough: How is it Different?
Gluten-free sourdough uses rice, buckwheat, or sorghum flour instead of wheat flour.
- More Hydration: Gluten-free starters and doughs are usually wetter.
- Longer Fermentation: They take longer to develop strength.
- Gums/Starches for Structure: Xanthan gum or psyllium husk helps gluten-free bread hold together.
Check out this gluten-free sourdough recipe for step-by-step instructions!
Conclusion
Sourdough baking is a journey of experimentation and learning. Remember that every baker faces challenges if your bread isn’t turning out as expected.
By focusing on starter health, fermentation times, and proper shaping techniques, you can troubleshoot common issues and improve your loaves over time.