Introduction
Sourdough dinner rolls are more than just bread; they’re a celebration of tradition, flavor, and the art of slow fermentation. These soft, golden rolls combine sourdough’s tangy essence with the comforting texture of classic dinner bread. This guide will deeply dive into these artisan treats’ history, preparation, and baking techniques. From understanding the science behind the sourdough starter to exploring delicious flavor variations, you’ll uncover the secrets to crafting rolls that steal the spotlight at any meal.
Table of Contents
The Art and Science of Sourdough Dinner Rolls
A Brief History of Sourdough Bread
Sourdough has been a staple in human diets for thousands of years, tracing back to ancient Egypt. Before commercial yeast was available, bakers relied on natural fermentation from wild yeast and bacteria to leaven bread. Over time, this method became renowned for its distinct tangy flavor and health benefits.
Sourdough rolls gained popularity as they adapted this ancient tradition into smaller, easy-to-serve portions. Today, they’re celebrated for their versatility, pairing beautifully with soups, salads, or simply a pat of butter.
Understanding the Unique Characteristics of Sourdough Dinner Rolls
Unlike regular dinner rolls, sourdough rolls are leavened with a live, active sourdough starter rather than commercial yeast. This starter contributes to the rolls’ complex flavor and airy texture, making them a unique and intriguing addition to your baking repertoire.
The fermentation process is key—allowing the dough to develop gluten naturally while enhancing its digestibility. Moreover, the longer proofing time of sourdough creates a crumb with a tender chew and an unmistakable tang that elevates these rolls to gourmet status.
Preparing to Bake Sourdough Dinner Rolls
Essential Ingredients for Sourdough Dinner Rolls

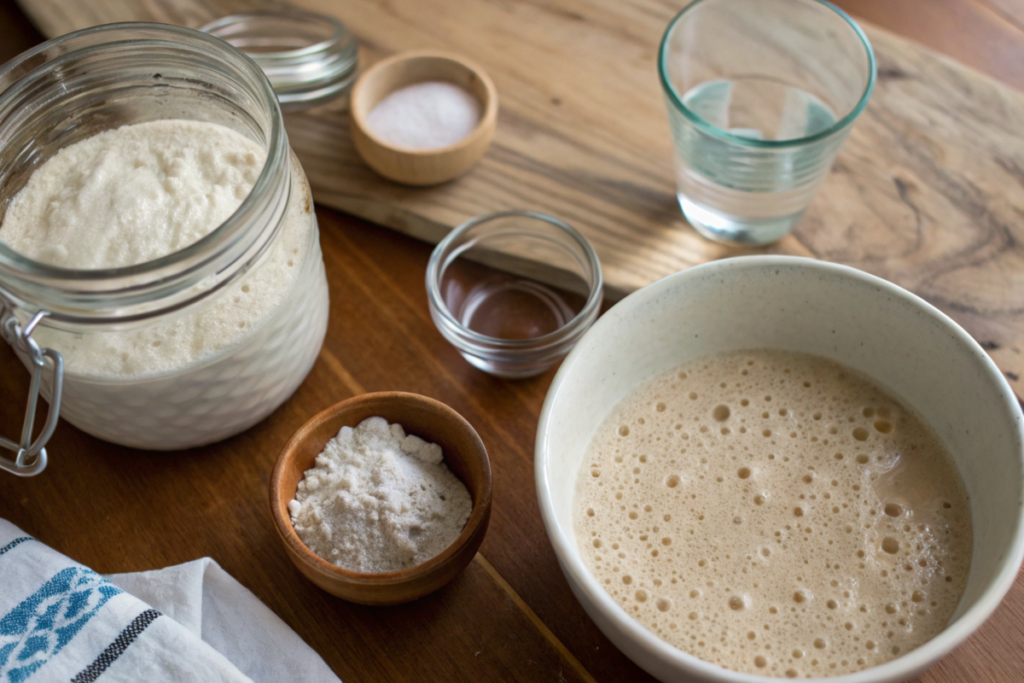
Crafting the perfect sourdough dinner rolls starts with quality ingredients. Each component plays a vital role in the flavor and texture of your rolls, so it’s worth choosing the best.
- Flour: Bread flour is preferred for its high gluten content, which gives the rolls their characteristic chew. However, you can mix bread and whole wheat flour for added depth.
- Sourdough Starter: A well-fed, bubbly starter is the heart of this recipe, providing natural leavening and tangy flavor.
- Water: Filtered water ensures that no chlorine interferes with the activity of your starter.
- Salt: Adds flavor and strengthens gluten structure.
- Optional Ingredients: Butter, olive oil, or honey can enhance softness and add a hint of sweetness.
Selecting the Right Flour
Choosing the right flour impacts not only texture but also flavor. Bread flour gives a sturdy structure, but don’t stop experimenting with whole-grain options like spelled or rye. These flours add nutty undertones that complement the sourdough’s tanginess. Remember the hydration levels; whole grain flours may require slightly more water.
The Role of a Healthy Sourdough Starter
Your sourdough starter is the cornerstone of success. It is essential to maintain its health by regularly feeding it with equal flour and water. It’s ready to leaven your rolls when your starter peaks (bubbly, active, and slightly domed). If your starter feels sluggish, feed it twice daily for a few days to revive its vigor. With a healthy starter, you can confidently embark on your sourdough dinner roll journey.
Tip: If you’re new to sourdough starters, check out this guide to maintaining a healthy starter for step-by-step instructions.
Necessary Equipment and Tools
Equipping yourself with the right tools ensures an easier and more enjoyable baking process.
- Mixing and Kneading Tools: A sturdy mixing bowl and a bench scraper are invaluable. You can work by hand or use a stand mixer with a dough hook attachment for kneading.
- Proofing and Baking Equipment:
- A dough-proofing basket or a bowl lined with a floured tea towel supports the dough during fermentation.
- Parchment paper and a baking tray or cast-iron skillet to ensure even heat distribution in the oven.
- A kitchen scale for accurate measurements is crucial for consistent results.
Now that your ingredients and tools are prepped, you’re ready to dive into the heart of the process: crafting these delightful rolls step by step!
Crafting the Perfect Sourdough Dinner Rolls

Step-by-Step Recipe for Sourdough Dinner Rolls
Creating sourdough dinner rolls requires patience and attention to detail, but the results are worth every minute. This section will guide you through the entire process, from activating your starter to baking beautifully golden rolls. Your commitment and dedication to the process will be rewarded with delicious, homemade sourdough dinner rolls.
Preparing the Sourdough Starter
Before beginning, ensure your starter is active and bubbly. Feed it 6–8 hours before starting the recipe, using equal parts water and flour. To confirm its readiness, the starter should pass the “float test” (a small dollop floats in water).
Mixing the Dough
- Combine Ingredients: Mix 500 grams of bread flour, 100 grams of sourdough starter, 10 grams of salt, and 300 grams of water in a bowl until just combined.
- Autolyse: Let the mixture rest for 30 minutes. This step allows the flour to hydrate and gluten to begin forming.
- Add Optional Fat or Sweeteners: Incorporate softened butter or honey for extra flavor and tenderness. Knead until the dough becomes smooth and elastic.
Bulk Fermentation Process
The dough undergoes its first rise during this step, developing both flavor and structure.
- First Stretch and Fold: After 30 minutes of resting, stretch one side of the dough and fold it over the top. Rotate the bowl and repeat on the other three sides.
- Repeating the Process: Perform 3–4 sets of stretch-and-folds at 30-minute intervals. This strengthens the dough without extensive kneading.
- Let It Rest: Cover the dough and let it ferment at room temperature for 4–6 hours until it doubles in size.
Shaping the Rolls
Once bulk fermentation is complete, it’s time to divide and shape the dough.
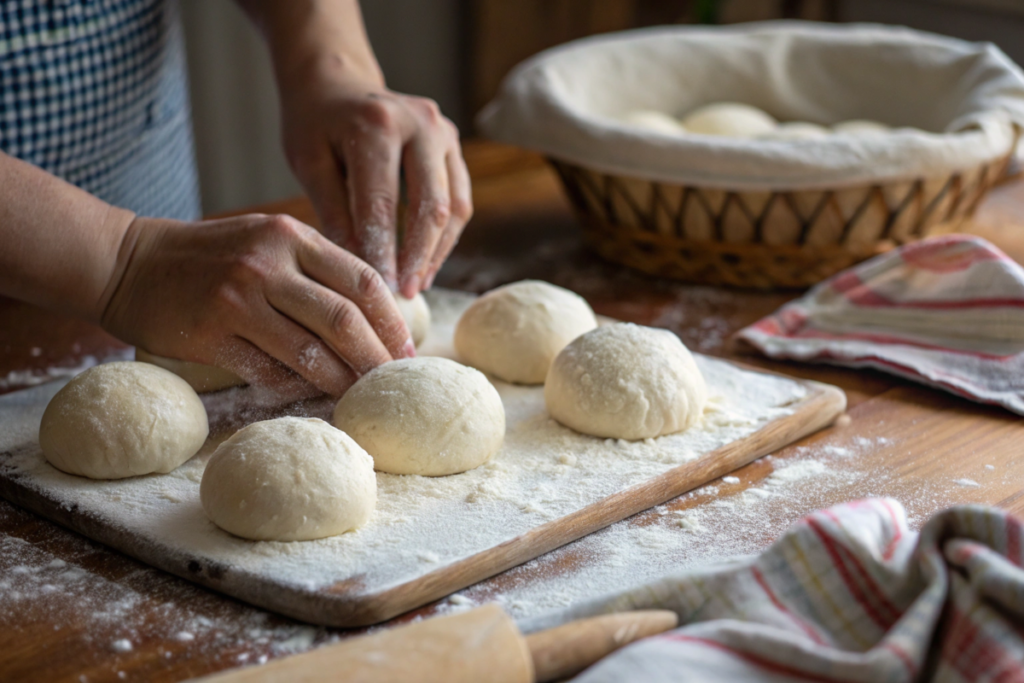
- Divide the Dough: Turn the dough onto a lightly floured surface and divide it into equal portions (about 60 grams each).
- Shape Each Roll: Form each portion into a round ball by pulling the edges toward the center and pinching them closed. Place the rolls seam-side down on a parchment-lined tray.
Final Proofing
Allow the rolls to proof for 2–4 hours at room temperature or overnight in the refrigerator. They should puff up slightly but not double in size.
Baking to Perfection
- Preheat the Oven: Heat your oven to 375°F (190°C). Place a pan of water on the bottom rack to create steam, which helps develop a soft crust.
- Bake the Rolls: Bake for 20–25 minutes until golden brown and sound hollow when tapped on the bottom.
- Cool Completely: Transfer the rolls to a wire rack to cool for at least 20 minutes before serving.
With these steps, your sourdough dinner rolls will come out light, airy, and burst with flavor every time!
Enhancing and Serving Sourdough Dinner Rolls
Flavor Variations and Add-ins
Sourdough dinner rolls are wonderfully versatile, and experimenting with flavors can turn them into something extraordinary. By adding simple ingredients to the dough, you can create a variety of rolls suited to any occasion.
Incorporating Herbs and Spices
- Garlic and Rosemary: Add minced garlic and chopped rosemary to the dough for a fragrant, savory twist. These rolls pair beautifully with soups and roasted dishes.
- Cinnamon and Nutmeg: For a sweeter variation, incorporate cinnamon, nutmeg, and a touch of brown sugar. These are delightful for breakfast or as a snack.
- Za’atar or Italian Seasoning: Infuse the dough with Mediterranean flavors for a unique flair that complements pasta dishes or grilled meats.
Adding Cheese or Seeds
- Cheese: Fold shredded cheddar, parmesan, or gruyere into the dough for gooey, flavorful rolls.
- Seeds: Sprinkle sesame, sunflower, or poppy seeds on top before baking for a nutty crunch and added visual appeal.
- Nuts and Dried Fruits: Create a rustic vibe by adding chopped walnuts, pecans, or dried cranberries to the dough.
Serving Suggestions and Pairings
These sourdough rolls are a perfect addition to any meal. Their rich flavor and soft texture make them crowd-pleasers, whether served warmly from the oven or as part of a spread.
Ideal Accompaniments
- With Butter and Jam: For a comforting treat, keep it simple with salted butter or homemade jam.
- With Soups and Salads: Serve alongside creamy soups or fresh salads for a balanced, satisfying meal.
- As Sliders: Turn the rolls into mini sandwiches by adding your favorite fillings like grilled chicken, roasted veggies, or cheese.
Storing and Reheating Leftovers
To ensure your sourdough dinner rolls stay fresh and delicious, proper storage is key:
- Storing: Place cooled rolls in an airtight container at room temperature for up to 3 days. For longer storage, freeze them in a resealable bag.
- Reheating: Warm rolls in a 350°F (175°C) oven for 5–7 minutes or microwave for a few seconds to revive their softness.
- Refreshing Frozen Rolls: Thaw rolls at room temperature, then reheat them as described above for a fresh-from-the-oven taste.
With these enhancements and serving tips, your sourdough dinner rolls will become a centerpiece of every meal, leaving your guests impressed and satisfied!
Troubleshooting and FAQs
Common Issues and Solutions in Sourdough Roll Baking
Even experienced bakers encounter challenges when making sourdough dinner rolls. Don’t worry! You can address these issues and achieve consistently delightful results with troubleshooting.
Dealing with Dense or Hard Rolls
Dense or tough rolls are often a result of under-fermentation or insufficient kneading. Here’s how to fix them:
- Check Your Starter: An inactive or weak starter won’t provide enough lift. Make sure it’s bubbly and passes the float test before using it.
- Increase Proofing Time: Underproofing can leave the dough dense. Allow enough time for the rolls to rise until they’re light and slightly springy to the touch.
- Knead Thoroughly: Ensure the dough is well-developed by kneading until it’s smooth and elastic.
Addressing Overproofing and Underproofing
Striking the right balance during proofing is key to perfect sourdough rolls.
- Overproofed Rolls: They may collapse during baking if the rolls expand too much. To avoid this, proof only until the dough is slightly puffy and has not doubled in size.
- Underproofed Rolls: Rolls that haven’t risen enough will be dense. Extend the proofing time, especially in cooler environments, where fermentation slows.
For detailed insights into the fermentation process, explore this guide on dough fermentation.
Frequently Asked Questions
What makes sourdough dinner rolls different from regular rolls?
Sourdough rolls are naturally leavened using a live sourdough starter instead of commercial yeast. This gives them a unique tangy flavor and a tender crumb that sets them apart from regular dinner rolls.
Can I use all-purpose flour instead of bread flour?
Yes, you can use all-purpose flour, but the rolls may have a slightly softer texture. Bread flour’s higher gluten content helps create structure and chewiness, so it’s recommended for the best results.
How do I know when my sourdough starter is ready to use?
Your starter is ready when it’s doubled in size, bubbly, and slightly domed at the top. Performing the float test (a spoonful of starter floats in water) is a quick way to check its readiness.
Can I make the dough ahead of time and bake it later?
Absolutely! You can refrigerate the shaped rolls overnight for a slow final proof. This enhances the flavor and lets you bake them fresh the next day.
How should I store sourdough dinner rolls to keep them fresh?
Store rolls in an airtight container at room temperature for up to three days. For longer storage, freeze and reheat them in the oven when needed.
Can I freeze sourdough dinner rolls?
Yes, sourdough dinner rolls freeze exceptionally well, making them a convenient option for meal planning or preparing in advance for special occasions. Freezing preserves their flavor and texture, so you can enjoy fresh-tasting rolls without baking them daily.
To freeze sourdough rolls, ensure they are fully baked and completely cooled. This prevents excess moisture from forming ice crystals, leading to freezer burn and affecting quality. Once cooled, place the rolls in a freezer-safe bag or airtight container, removing as much air as possible to maintain freshness. For added protection, wrap each roll individually in plastic or aluminum foil before placing them in the container.
When you’re ready to enjoy the rolls, thaw them at room temperature until soft. For best results, reheat them in an oven preheated to 350°F (175°C) for 5–10 minutes. This step warms the rolls and helps refresh their texture, making them taste as if they were just baked.
For those who prefer to freeze unbaked rolls, you can shape the dough, allow for a partial rise, and then freeze. When ready to bake, let the rolls thaw and complete their final proof before baking as usual. This method ensures you always have freshly baked rolls prepared at your convenience.
Armed with these solutions and answers, you’re ready to tackle any sourdough roll challenge that comes your way!

