
Introduction to Chocolate Sourdough Bread Recipe
The chocolate sourdough bread recipe brings a unique and exciting twist to traditional baking. This loaf combines the tangy complexity of sourdough with the rich, earthy flavor of cocoa powder, often complemented by chunks of chocolate or sweet add-ins. It perfectly balances sweetness and acidity, making it ideal for those who prefer desserts that are not overly sugary.
Unlike sweet bread recipes that rely on commercial yeast and sugar, this one uses a sourdough starter, which gives the bread its unique texture, depth of flavor, and health benefits. It’s chewy yet soft, with a hint of chocolate that enhances without overpowering the sourdough’s signature tang.
Table of Contents
History and Popularity
Sourdough itself has ancient roots, dating back thousands of years. But pairing it with chocolate is a relatively modern twist that has caught the attention of artisan bakers worldwide. As home baking gained popularity, especially during recent global lockdowns, adventurous bakers began experimenting with new flavors. Enter the chocolate sourdough—a trend that bridges the gap between sweet and savory baking.
Whether served with a smear of butter, with fruit, or enjoyed as-is, chocolate sourdough bread has become a beloved staple in many kitchens. Its rise in popularity can also be credited to its versatility and the fact that it feels indulgent but remains wholesome.
Health Benefits of Sourdough Bread
Why choose sourdough? Unlike conventional bread, sourdough is fermented, meaning it’s easier to digest and packed with nutrients. When you add cocoa, the bread gains an extra layer of antioxidants. Some benefits include:
- Improved digestion: The fermentation process breaks down gluten, making nutrients more bioavailable.
- Rich in probiotics: Sourdough can promote gut health, thanks to the beneficial bacteria present in the starter.
- Reduced sugar content: This bread is naturally low in sugar, which makes it a better option than traditional sweet bread.
Ingredients and Their Roles
The perfect chocolate sourdough bread recipe begins with understanding the ingredients and their specific roles. Each component is critical in balancing flavor, texture, and fermentation, ensuring a rich, satisfying, and irresistibly good loaf.
Essential Ingredients
Every ingredient in this recipe works together harmoniously, but let’s take a closer look at the key players:
- Sourdough Starter: The heart of the recipe, a healthy sourdough starter, provides natural yeast and lactic acid bacteria, which create a tangy flavor and aid in fermentation. It’s what gives the bread its characteristic texture and depth.
- Flour: A combination of bread and whole wheat flour strikes the perfect balance between structure and nuttiness. Bread flour provides the gluten strength needed for a good rise, while entire wheat adds complexity.
- Cocoa Powder: Unsweetened cocoa powder infuses the bread with its chocolaty essence and contributes to its earthy, slightly bitter notes that complement the sourdough tang.
- Water: Hydration is crucial for proper gluten development and fermentation. Use filtered water to avoid chlorine, which can harm the starter.
- Salt: Enhances flavor and helps control fermentation by slowing yeast activity, ensuring an even rise.
- Chocolate Chunks or Chips (Optional): For bursts of gooey chocolate in every bite, semi-sweet or dark chocolate chunks are a favorite add-in.
- Sweetener (Optional): A touch of honey or brown sugar can be added to balance the cocoa’s bitterness and enhance the overall flavor, though unnecessary.
Optional Add-ins
Want to take your chocolate sourdough to the next level? Consider these creative options:
- Nuts: Chopped walnuts or hazelnuts add crunch and a nutty richness that pairs beautifully with chocolate.
- Dried Fruit: Dried cherries, cranberries, or raisins bring the loaf a subtle sweetness and chewiness.
- Spices: A pinch of cinnamon or cardamom can add warmth and complexity to the flavor profile.
- Orange Zest: For a bright, citrusy twist, grate some orange zest into the dough.
Experimenting with these add-ins can yield a loaf that’s uniquely yours!
How Does Cocoa Powder Affect Sourdough?
The addition of cocoa powder transforms this bread into something extraordinary. However, it’s important to note that cocoa can impact the dough’s hydration and fermentation. Here’s how:
- Moisture Absorption: Cocoa powder absorbs water, so you may need to adjust your hydration levels slightly to maintain a workable dough.
- Fermentation Slowing: The acidity in cocoa can slow fermentation slightly, meaning proofing times may be longer.
- Flavor Profile: Cocoa deepens the bread’s flavor, lending a subtle bitterness that complements the tanginess of sourdough.
Understanding cocoa’s role in the dough allows you to create a perfectly balanced loaf every time.
Step-by-Step Recipe for Chocolate Sourdough Bread
Now that you know the essential ingredients, it’s time to dive into the chocolate sourdough bread recipe . This step-by-step guide will take you through the process from starter to fresh-baked loaf. By following these instructions closely, you’ll create a chocolate sourdough that’s beautifully textured, rich in flavor, and sure to impress anyone lucky enough to taste it.
Preparing the Sourdough Starter
To start, you’ll need an active sourdough starter. If you don’t have one yet, don’t worry! Making a sourdough starter from scratch takes about 5 to 7 days. Here’s how to get it ready for the recipe:
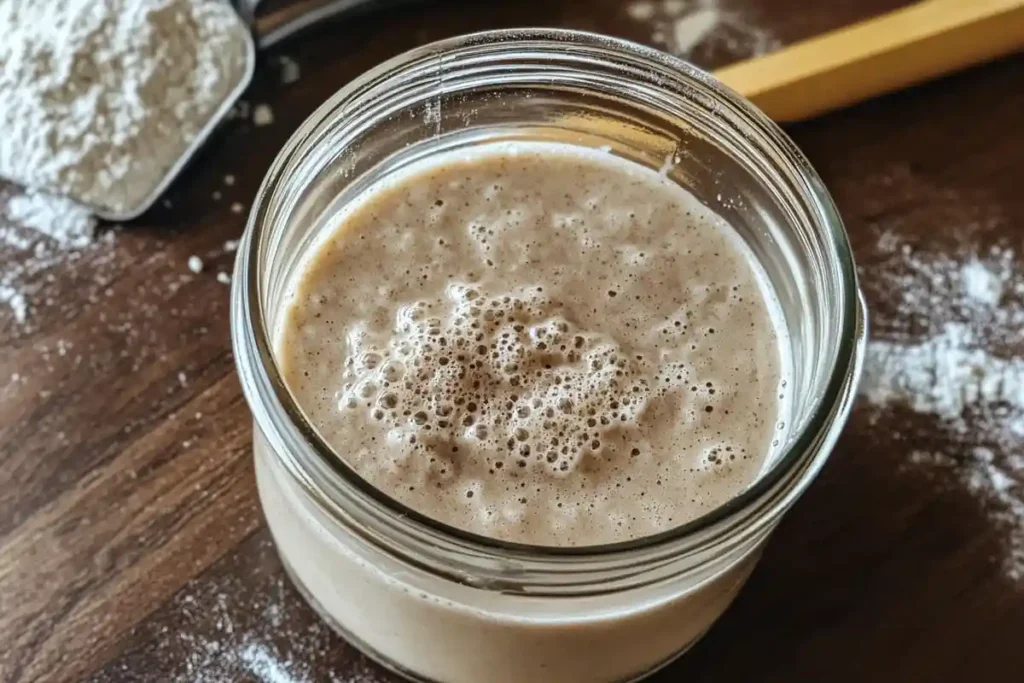
- Feed Your Starter: Feed your starter with equal parts water and flour. Before using it in your recipe, you want it to be bubbly and active. The starter should double in size within 4 to 6 hours of feeding, indicating it’s ready.
- Consistency Check: The starter should have a thick, pancake batter-like consistency. If it’s too thin, add more flour; if too thick, add more water.
- Timing: Prepare your starter the day before so it’s fully active and ready to go when you start the dough.
Pro Tip: If your starter has been in the fridge, take it out and feed it 24 hours before you begin to ensure it’s bubbly and active.
Mixing the Dough

Once your starter is ready, you can mix the dough. Here’s how to get that perfect dough consistency:
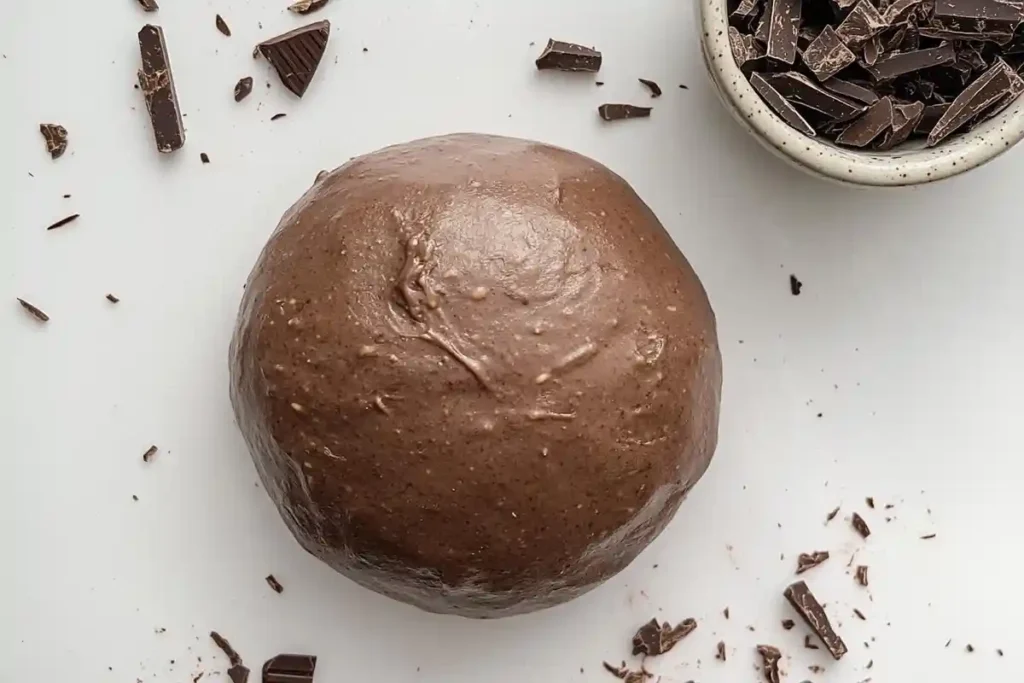
- Combine Ingredients: In a large mixing bowl, combine 100g of your active sourdough starter, 350g of bread flour, 50g of whole wheat flour, 50g of unsweetened cocoa powder, and 240g of water.
- Autolyse: Mix the dough until it forms a shaggy mass, then let it rest for 30 minutes. This resting period, known as autolyze, allows the flour to absorb the water, making it easier to knead.
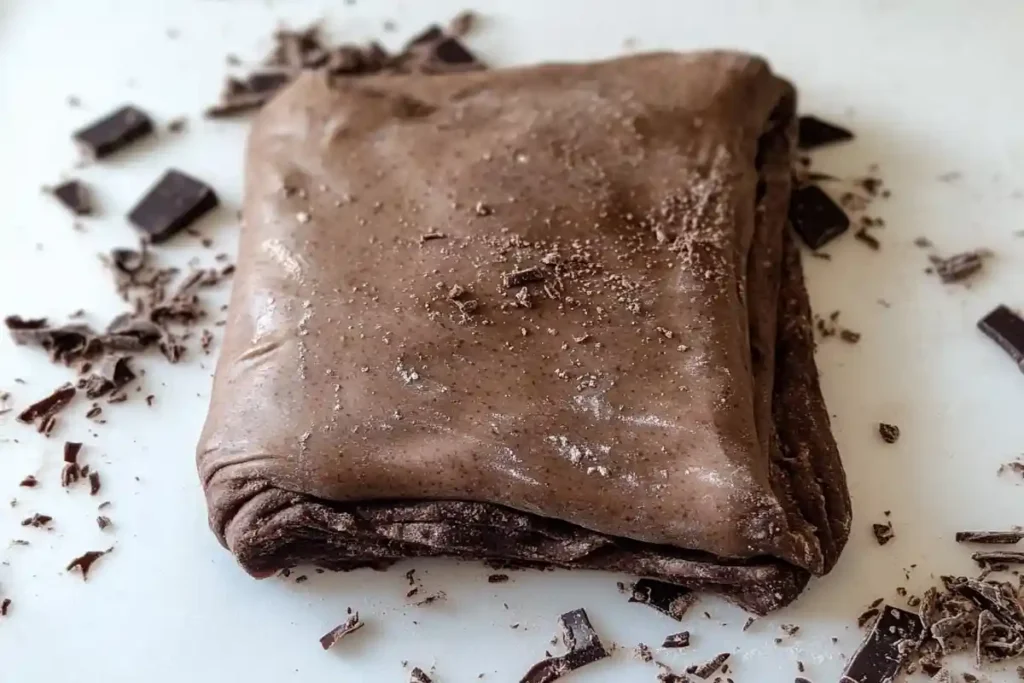
- Add Salt: After the autolyze, sprinkle 10g of salt over the dough. Begin to knead by hand or with a stand mixer for about 8 to 10 minutes. The dough should be smooth and elastic.
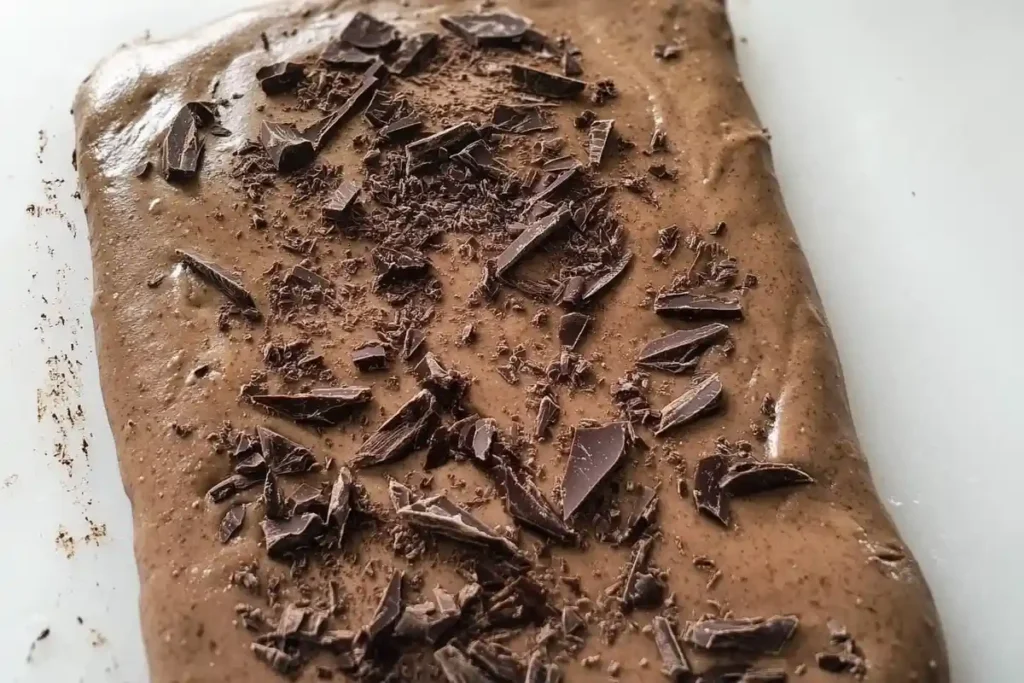
- Add Chocolate (Optional): If you’re adding chocolate chunks, fold them in during the final minutes of kneading. It ensures an even distribution throughout the dough.
Pro Tip: The dough might feel slightly sticky due to the cocoa powder, but avoid adding too much extra flour. It will help maintain the bread’s chewy texture.
Bulk Fermentation Process
Now that your dough is mixed, it’s time for the bulk fermentation—a critical step in developing that signature sourdough texture and flavor.
- First Rise: Cover your dough with a damp cloth or plastic wrap and let it rise warmly for 4 to 6 hours. You want the dough to double in size.
- Stretch and Fold: Every 30 minutes during the first 2 hours, stretch and fold (lifting one side of the dough and folding it over itself) to help strengthen the gluten.
The dough will develop that delicious sourdough flavor during the bulk fermentation while slowly rising.
Shaping the Loaf
Once the dough has risen and is airy, it’s time to shape it into a loaf:
- Pre-shape: Turn the dough out onto a lightly floured surface. Gently shape it into a round or oblong loaf, depending on your preference.
- Rest: Let the dough rest for about 10 minutes to relax.
- Final Shaping: After the dough has rested, shape it into its final form, whether round or batard. Use a tight, controlled motion to get a smooth surface.
Pro Tip: Shaping is important for the final look and rise. Make sure the dough is taut, but not overly tight.
Proofing the Dough
Proofing is the final step before baking, allowing the dough to rise to its fullest potential.
- Cold Proof: Place your shaped dough in a proofing basket or a bowl lined with a floured cloth. Cover it and refrigerate for 12 to 16 hours. This cold fermentation process enhances the bread’s flavor and texture.
- Room Temperature Proof: If you’re in a rush, you can proof the dough at room temperature for about 2 to 3 hours until it has visibly puffed up and jiggles slightly when shaken.
Pro Tip: Longer cold proofing allows the dough to develop more flavor and complexity. If you have the time, it’s well worth the wait.
Baking Techniques
When it’s time to bake, follow these simple steps for the best results:
- Preheat Oven: Preheat your oven to 475°F (245°C) for at least 30 minutes before baking. If you have a Dutch oven, place it inside to heat up.
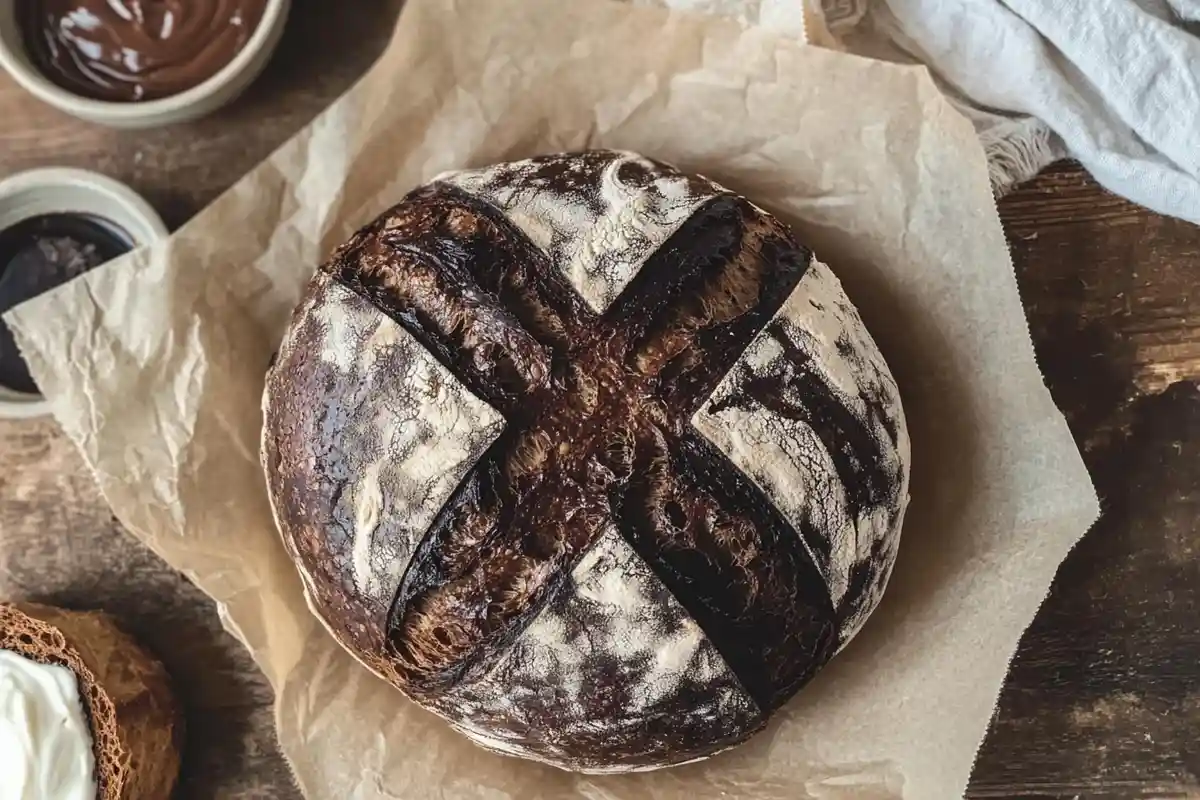
- Score the Dough: Just before baking, use a sharp knife or bread lame to score the top of the dough. It allows the bread to expand properly during baking.
- Bake: Using a Dutch oven, carefully place the dough inside and cover it with the lid. Bake for 20 minutes, then uncover and bake for 25 to 30 minutes until the bread is golden and the internal temperature reaches around 200°F (93°C).
- Cool: Allow the bread to cool completely on a wire rack before slicing. It ensures the best texture and flavor development.
Tips for Perfecting Your Chocolate Sourdough
Creating the perfect chocolate sourdough bread recipe can feel like an art form, but with the right tips, you’ll be well on your way to bakery-quality results. Whether you’re troubleshooting common issues or fine-tuning your technique, these tips will help you achieve that perfect loaf.
Common Mistakes to Avoid
Even seasoned bakers can run into hiccups. Avoiding these pitfalls will save you time and frustration:
- Using an Inactive Starter: The most common mistake is starting with a weak or inactive sourdough starter. Without an active starter, your dough won’t rise properly or develop the tangy flavor sourdough is known for.
- Tip: Always feed your starter 4–6 hours before using it, and ensure it doubles in size before adding it to your dough.
- Overproofing or Underproofing: Timing is everything with sourdough. Overproofed dough can collapse, while underproofed dough is dense and lacks volume.
- Tip: Use the “poke test” to check: gently press your finger into the dough—if it springs back slowly, it’s ready.
- Not Adjusting for Cocoa Powder: Cocoa absorbs water and can dry your dough if not properly hydrated.
- Tip: Increase your water content slightly when using cocoa powder to maintain the dough’s elasticity.
- Skipping the Stretch and Folds: Neglecting this step can result in a weak gluten structure, leading to flat loaves.
- Tip: Incorporate 3 to 4 rounds of stretch and folds during bulk fermentation for a strong and airy structure.
Does Chocolate Sourdough Take Longer to Ferment?
Yes, chocolate sourdough often takes longer to ferment compared to traditional sourdough, and here’s why:
- Cocoa’s Acidity: The natural acidity in cocoa powder can slow down yeast activity, extending fermentation time.
- Add-ins Impact: Ingredients like chocolate chunks or dried fruits add weight to the dough, which can slightly reduce rise speed.
- Hydration Levels: Adjusting water content for cocoa can also affect fermentation timing.
Pro Tip: Be patient and monitor your dough closely rather than sticking rigidly to the clock. Watch for visual cues, like the dough doubling in size or becoming puffy and elastic.
Extra Tricks for Better Bread
- Temperature Control: Keep your dough at a consistent, warm temperature during fermentation. Ideal fermentation occurs between 75°F and 80°F (24°C to 27°C).
- Flour Quality: Use high-quality bread flour for better gluten development.
- Enhance Flavor: Add a pinch of espresso powder or vanilla extract to amplify the chocolate notes without overpowering the sourdough’s tang.
FAQs About Chocolate Sourdough Bread Recipe
Let’s address some of the most common questions about chocolate sourdough bread. Whether you’re a first-time baker or an experienced pro, these answers will help clarify doubts.
Why is Sourdough Bread Not Fattening?
Sourdough bread is often considered a healthier option compared to conventional bread. Here’s why:
- Lower Glycemic Index: The fermentation process reduces the glycemic index of sourdough, meaning it has a less significant impact on blood sugar levels.
- Easier Digestion: The natural fermentation process breaks down gluten and starches, making sourdough easier for your body to process.
- Nutrient-Rich: Sourdough bread retains more vitamins and minerals, especially when made with whole grain flour.
What is the Biggest Mistake You Can Make with Your Sourdough Starter?
The biggest mistake when working with a sourdough starter is neglecting its health. The starter can weaken or die without proper care, leaving your bread flat and flavorless.
Common errors include:
- Irregular Feeding: To remain active, a starter needs consistent feeding with fresh flour and water.
- Contamination: Using unclean utensils or containers can introduce harmful bacteria or mold.
- Temperature Issues: Too hot or too cold environments can harm the starter. Aim for a temperature range of 70°F to 80°F (21°C to 27°C) for optimal growth.
How Does Cocoa Powder Affect Sourdough?
Cocoa powder enhances the flavor and color of chocolate sourdough bread, but it also affects the dough’s behavior:
- Hydration Needs: Cocoa absorbs moisture, which can make the dough stiffer. Adjust hydration by adding extra water, a little at a time.
- Fermentation Slowdown: Cocoa’s acidity can slightly slow the fermentation process, so proofing times may need extended.
- Flavor Depth: The bitterness of cocoa balances beautifully with the tangy sourdough, creating a unique and complex flavor profile.
Does Chocolate Sourdough Take Longer to Ferment?
Yes, chocolate sourdough bread often takes longer to ferment than plain sourdough. Here’s why:
- Cocoa’s Impact: Cocoa can inhibit yeast activity slightly, resulting in a slower rise.
- Add-ins Influence: Ingredients like chocolate chunks or nuts add weight to the dough, reducing its ability to rise quickly.
- Hydration Adjustment: Adjusting water levels for cocoa can also affect fermentation speed.
If you loved learning about this chocolate sourdough bread recipe, why not explore more of my delicious creations? Check out these must-try recipes for your next baking adventure: Sourdough Discard Sugar Cookies, Sourdough Discard Dumplings, Sourdough Discard Soft French Bread, and How to Make Sourdough Starter at Home. Each recipe is packed with tips and tricks to elevate your home baking!