
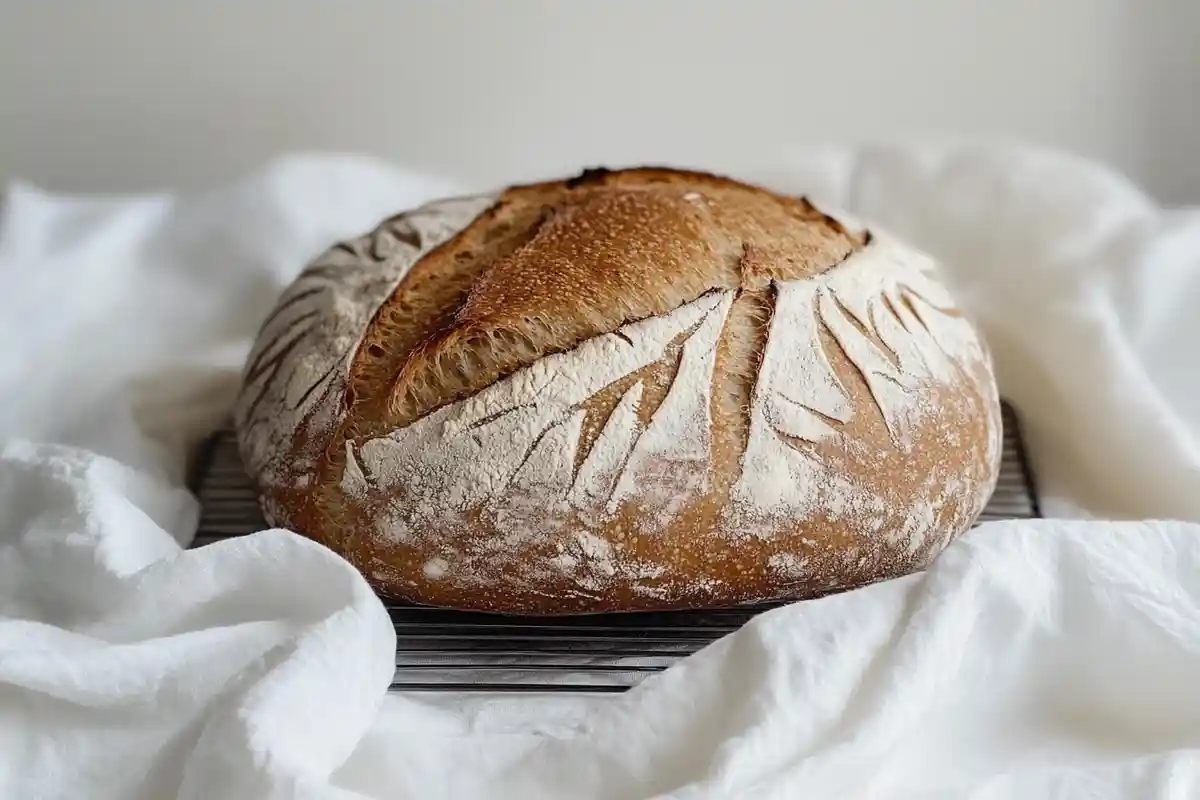
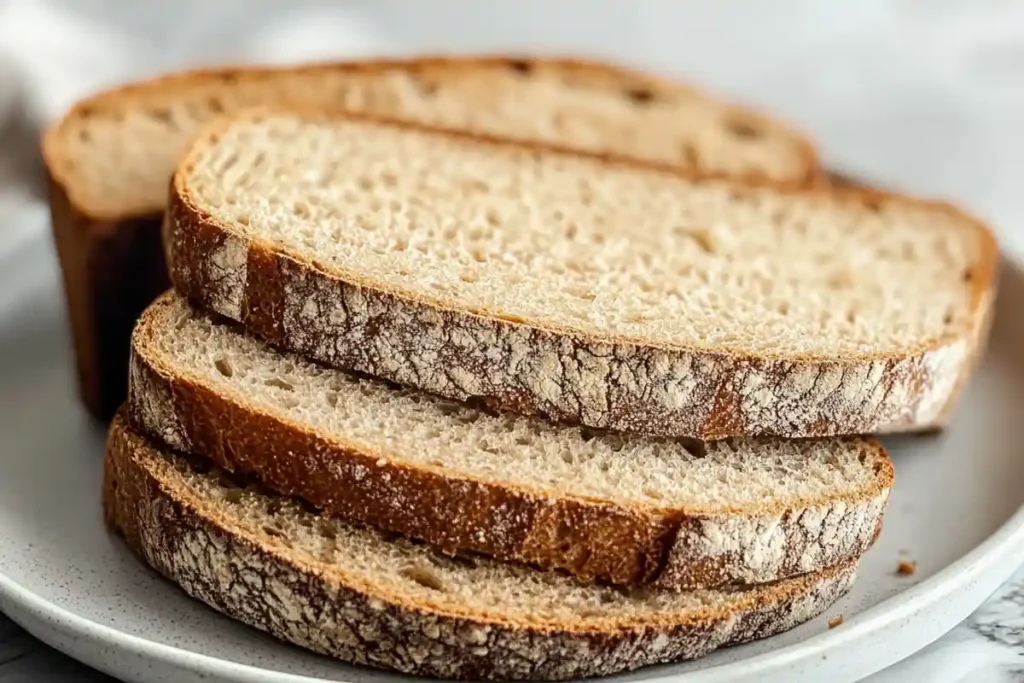
The allure of sourdough bread is undeniable—it’s hearty, flavorful, and packed with nutrients. But when you add buckwheat into the mix, you unlock a new taste and health benefits that are truly unique. Whether an experienced baker or just starting, learning to craft a buckwheat sourdough bread recipe can elevate your skills and introduce you to a gluten-free delight perfect for any diet. This guide covers everything you need, from ingredients and tools to techniques and troubleshooting tips.
Let’s delve into the world of buckwheat sourdough bread and uncover why it’s not just another bread, but a unique and wholesome masterpiece with its own distinct flavor and health benefits!
Table of Contents
Introduction to Buckwheat Sourdough Bread
Why Buckwheat is a Game Changer
Buckwheat, despite its name, isn’t a type of wheat. It’s a seed from the rhubarb family, making it naturally gluten-free. It makes it a fantastic option for those avoiding gluten or looking to diversify their grain choices. Beyond being gluten-free, it offers a rich, earthy flavor that adds complexity to sourdough bread, turning every bite into a flavorful journey.
Another remarkable feature of buckwheat is its versatility. Whether adding it to a starter or using it as the main flour, it enhances texture and taste. Plus, it works well with other flours, allowing you to experiment and customize your recipe in endless ways. This versatility is sure to inspire your baking journey.
Nutritional Benefits of Buckwheat
Health-conscious bakers, rejoice! Buckwheat is a powerhouse of nutrients. It contains fiber, essential minerals like magnesium and iron, and plant-based protein. Additionally, it has a low glycemic index, making it a smart choice for those managing blood sugar levels. When incorporated into sourdough, its nutrients are further enhanced through fermentation, as the process increases bioavailability. This nutritional powerhouse is sure to reassure you about your healthy baking choice.
Did you know buckwheat is also rich in antioxidants like rutin, which helps with inflammation and heart health? It’s not just about baking a loaf of bread—it’s about creating a loaf packed with benefits!
Overview of Sourdough Bread and Fermentation
Sourdough bread has been cherished for centuries, not just for its tangy flavor but for its digestive benefits. Unlike quick breads, sourdough relies on a natural fermentation process involving wild yeast and bacteria. It creates a complex flavor profile and makes the bread easier to digest and more nutritious.
Combining the benefits of buckwheat with sourdough fermentation gives you the best of both worlds. The natural acids in sourdough break down phytic acid in the buckwheat, allowing your body to absorb more minerals. Fermentation gives the bread its characteristic tang and tender crumb, making it a hit at any table.
Essential Ingredients and Tools for Buckwheat Sourdough Bread
Key Ingredients: Buckwheat Flour and Alternatives
When crafting the perfect buckwheat sourdough bread recipe, the choice of ingredients can make or break your loaf. The star ingredient here is, of course, buckwheat flour. It boasts a nutty, earthy flavor that uniquely tastes the bread. Thanks to its gluten-free nature, it’s ideal for those avoiding wheat while desiring a hearty bread experience.
However, buckwheat works best when paired with other flours, especially for sourdough. Why? Because it lacks gluten, the protein responsible for giving traditional bread its stretch and structure. Adding a small portion of whole wheat, rice, or tapioca flour can help balance the texture, offering a more cohesive crumb while still keeping the focus on buckwheat’s unique profile.
If you’re strictly gluten-free, don’t worry—mixing in almond or oat flour can yield fantastic results. Each blend adds a different nuance to the bread’s taste and feel, so experiment to find what works for you!
Understanding Sourdough Starters

The sourdough starter is the beating heart of any sourdough recipe, and buckwheat sourdough is no exception. A starter is a live culture of wild yeast and bacteria that feeds on flour and water. For this recipe, incorporating buckwheat flour into the starter gives it a distinct flavor profile while maintaining its gluten-free properties.
To make a buckwheat sourdough starter, you must substitute regular flour with buckwheat flour in your feeding routine. Over a few days, the natural wild yeast will thrive, creating a bubbly, tangy starter that’s perfect for your bread. Be mindful, though—because buckwheat ferments faster than traditional wheat flours, you’ll need to watch it closely to avoid over-fermentation.
Tools You Need for Perfect Sourdough
Baking buckwheat sourdough bread doesn’t require fancy equipment, but a few key tools will make the process smoother and more enjoyable:
- Kitchen Scale: Precision is key in sourdough baking, especially when measuring ingredients and hydration levels.
- Mixing Bowls: Use non-reactive bowls, such as glass or stainless steel, for mixing and proofing the dough.
- Dutch Oven or Baking Stone: A Dutch oven helps mimic a professional bread oven, providing the high heat and steam needed for a crusty loaf.
- Proofing Basket (Banneton): This helps shape your loaf and create those beautiful spiral patterns on the crust.
- Bench Scraper: It is essential for handling sticky dough and shaping it without fuss.
While these tools can certainly make your baking experience easier, they’re not all essential. At its core, sourdough baking is about patience, intuition, and creativity. If you’re just starting out, focus on mastering the basics and gradually build your toolkit.
Step-by-Step Guide to Making Buckwheat Sourdough Bread
Preparing the Buckwheat Starter
The journey to a delicious buckwheat sourdough bread recipe starts with a robust and active sourdough starter. If you already have a starter made with traditional flour, transitioning it to buckwheat is simple. Replace the flour used in feedings with buckwheat flour over 4–5 days. This gradual process allows the wild yeast to adapt to the new medium.
If starting from scratch, mix equal parts of buckwheat flour and water in a jar and leave it at room temperature. Feed it daily by discarding half the mixture and adding fresh flour and water. Within 5–7 days, your starter should be bubbly and tangy, signaling it’s ready to use.
Keep an eye on the starter—buckwheat ferments quickly, so it’s easy to overfeed or make it sour. Adjust the feeding schedule to suit your environment, and always use it when it’s at its peak activity for the best results.
Mixing and Kneading Techniques
Buckwheat dough behaves differently from traditional wheat dough. Because buckwheat lacks gluten, the dough is stickier and less elastic. Don’t let this discourage you! Instead, embrace its unique qualities.
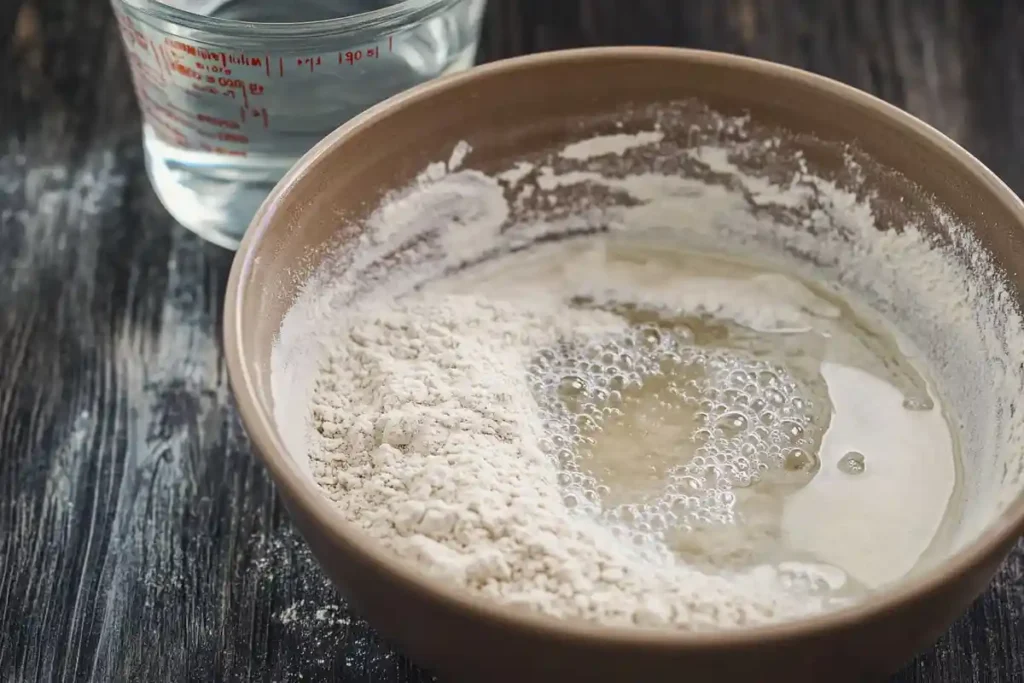
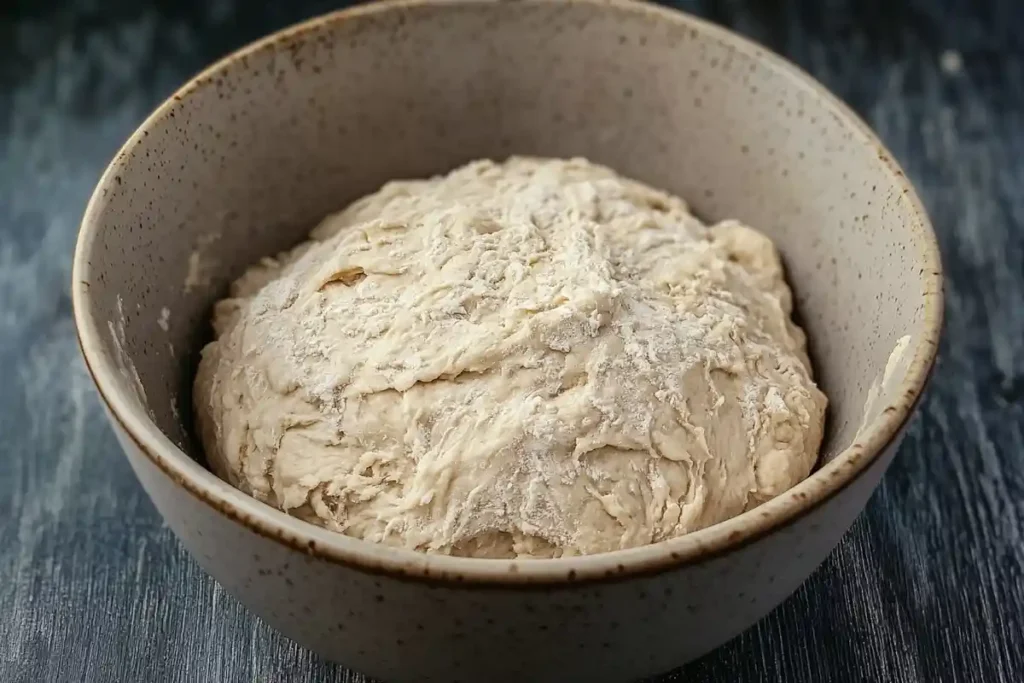
- Combine Ingredients: Mix your buckwheat starter with water, buckwheat flour, and any complementary flours (if using). Add salt last to avoid slowing down fermentation. Stir until the dough comes together—it will be thick and slightly sticky.
- Hydration Levels: Buckwheat flour absorbs much water, so achieving the right hydration is crucial. Start with a 75% hydration level (e.g., 375 ml of water for 500 g of flour) and adjust as needed.
- Kneading: Instead of traditional kneading, use the “stretch and fold” technique. It’s gentler and helps build structure without relying on gluten. Every 30 minutes, stretch one side of the dough and fold it over itself, repeating 4–6 times during the bulk fermentation phase.
Proofing and Fermentation
Fermentation is where the magic happens! After mixing, let the dough bulk ferment at room temperature for 4–6 hours. During this time, the natural yeast and bacteria in the starter will work their magic, creating a flavorful and airy loaf.
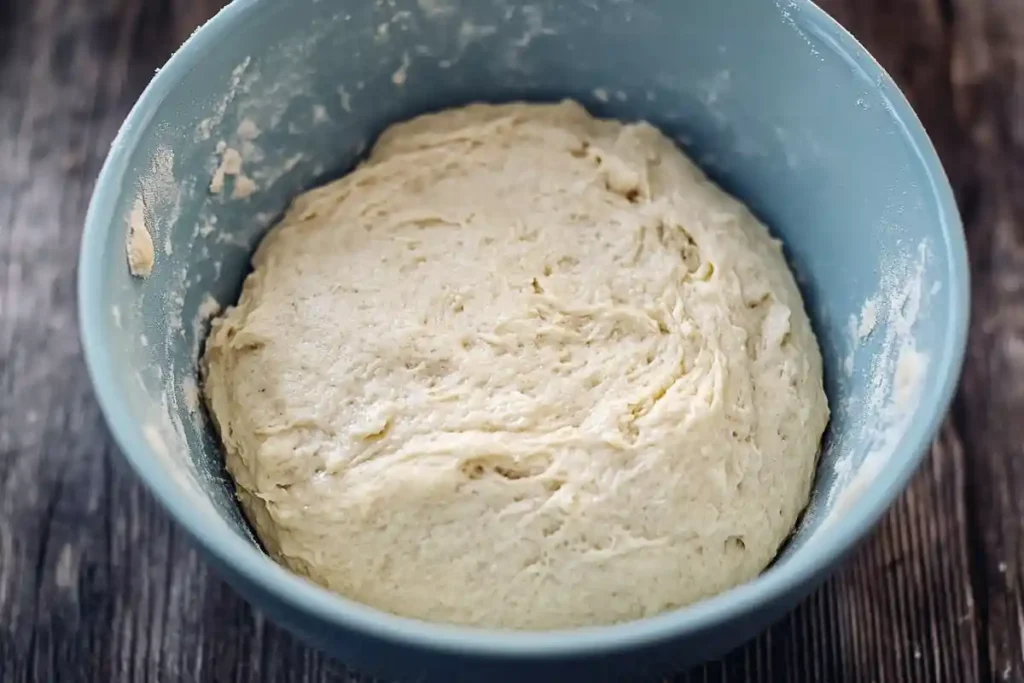

- Room Temperature Fermentation: Ideal for a mild sour flavor, but keep an eye on the dough to prevent overproofing.
- Cold Proofing (Optional): Refrigerate the dough overnight for a tangier taste. It slows down fermentation, allowing flavors to develop more deeply.
After the bulk ferment, shape the dough gently and place it in a floured proofing basket or bowl. Cover it loosely and let it rest for another 1–2 hours at room temperature or overnight in the fridge.
Baking Tips for Perfect Results
Baking is the final—and most exciting—step in your buckwheat sourdough bread journey. Proper preparation ensures a beautiful crust, airy crumb, and irresistible aroma.
- Preheat the Oven: Set your oven to its highest setting (usually 475–500°F or 245–260°C) and place a Dutch oven or baking stone inside. Preheating ensures the dough gets a burst of steam, critical for crust development.
- Score the Dough: Using a sharp blade or lame, make shallow cuts on the surface of the dough. It allows steam to escape and helps control the bread’s expansion in the oven.
- Bake with Steam: If using a Dutch oven, place the dough inside and cover it. The lid traps steam, creating a crusty exterior. Bake for 20 minutes covered, then remove the lid and bake for another 15–20 minutes until the crust is golden brown.
- Cooling: Let the bread cool completely on a wire rack before slicing. This step is crucial for setting the crumb and enhancing the flavors.
Health Benefits and Variations
Why Buckwheat is Ideal for Gluten-Free Diets
One of the standout features of buckwheat sourdough bread is its gluten-free nature. Despite its name, buckwheat isn’t related to wheat—it’s a seed, making it a safe option for those with gluten sensitivities or celiac disease. But that’s just the tip of the iceberg.
Buckwheat is rich in complex carbohydrates, which release energy slowly and keep you fuller for longer. Its high fiber content supports digestive health, while its low glycemic index makes it an excellent choice for maintaining stable blood sugar levels. Moreover, the fermentation process involved in sourdough baking reduces the anti-nutrients in buckwheat, enhancing the absorption of essential minerals like magnesium, zinc, and iron.
For those exploring gluten-free diets, buckwheat sourdough bread is a satisfying and nutritious alternative to store-bought gluten-free loaves, often loaded with preservatives and fillers.
Variations: Adding Seeds, Spices, or Herbs
One of the joys of baking is experimenting with flavors and textures, and buckwheat sourdough bread is no exception. Adding seeds, spices, or herbs can transform a basic loaf into a gourmet masterpiece. Here are some ideas to get you started:
- Seeds for Texture: Incorporate sunflower, sesame, or flaxseeds into the dough for a nutty crunch. Sprinkle some on top before baking for added visual appeal.
- Herbs for Flavor: Fresh or dried herbs like rosemary, thyme, or dill pair beautifully with buckwheat’s earthy tones.
- Spices for Warmth: A dash of cinnamon, nutmeg, or cardamom can add a subtle warmth, especially if you plan to enjoy the bread with sweet spreads.
These variations not only enhance the flavor but also increase the nutritional value of your bread. For instance, chia and flaxseeds add omega-3 fatty acids, while herbs and spices bring their health-boosting properties.
Shelf-Life and Storage Tips
Homemade bread, especially sourdough, doesn’t last as long as store-bought bread due to the absence of preservatives. However, proper storage can help maintain freshness:
- Room Temperature Storage: Wrap your loaf in a clean kitchen towel and store it in a bread box to keep the crust crisp and the crumb moist. It will stay fresh for 2–3 days.
- Freezing for Longevity: Slice the bread before freezing to thaw only what you need. Wrap individual slices in parchment paper and store them in an airtight freezer bag for up to 3 months.
- Reheating: Warm the bread in the oven at 350°F (175°C) for 5–10 minutes to restore the crust’s crunchiness.
FAQs For Buckwheat Sourdough Bread Recipe
Frequently Asked Questions
Can buckwheat be used in sourdough?
Absolutely! Buckwheat is an excellent addition to sourdough bread. Its earthy flavor and gluten-free properties make it a unique and nutritious alternative to traditional wheat flours. Whether used as a primary flour or blended with other gluten-free flours, it creates a loaf with a dense yet tender crumb. When used in sourdough starters, buckwheat ferments beautifully, lending a tangy note that complements the natural sourness of the bread.
What is the healthiest flour for sourdough bread?
The healthiest flour depends on your dietary needs, but buckwheat flour is undoubtedly one of the top contenders. Buckwheat offers numerous health benefits, packed with fiber, plant-based protein, and essential minerals. Its low glycemic index and high antioxidant content make it a smart choice for heart health and blood sugar control. Other healthy options include whole wheat, rye, and spelt flour, which can be blended with buckwheat for added nutrition and flavor.
What does buckwheat do to bread?
Buckwheat transforms bread in more ways than one. Its naturally nutty flavor enhances the overall taste, while its gluten-free nature makes the loaf denser and more compact. Additionally, buckwheat flour absorbs more water than wheat flour, resulting in a moist crumb. In sourdough, it ferments quickly, developing a deep, complex flavor profile perfect for artisan-style loaves.
Can I feed my sourdough starter buckwheat?
Yes, you can feed your sourdough starter with buckwheat flour! It works particularly well in gluten-free starters. Simply replace the usual flour in your feeding routine with buckwheat flour. Remember that buckwheat ferments faster, so you may need to adjust the feeding frequency to ensure your starter doesn’t become overly acidic. The result is a robust, active starter ready to create flavorful loaves of bread.
Expert Tips for First-Time Bakers
Embarking on your buckwheat sourdough bread recipe journey can be as rewarding as challenging. Here are some expert tips to help you succeed:
- Start with a Blend: If you’re new to baking with buckwheat, mix it with another flour (like rice or tapioca) to ease into the texture and structure differences.
- Mind the Hydration: Buckwheat flour absorbs more water, so monitor your dough’s consistency. If it feels too wet, add a small amount of additional flour.
- Watch the Proofing Time: Buckwheat dough ferments faster, so keep a close eye on the proofing process to avoid overproofed dough.
- Experiment Gradually: Add seeds, herbs, or spices in small amounts to test how they affect the flavor and texture of the bread.
- Don’t Rush the Cooling: Let your bread cool completely before slicing to allow the crumb to set and the flavors to develop fully.
If you loved exploring the world of buckwheat sourdough bread recipe, you’ll definitely enjoy diving into these related recipes! Discover the seasonal warmth of Pumpkin Sourdough Bread, the perfect soft texture of Sourdough Dinner Rolls, or satisfy your sweet tooth with the decadent Sourdough Chocolate Cookies. For even more sourdough inspiration, don’t miss the unique Sourdough Discard Tortillas to make the most of your starter. Happy baking!