
Introduction to Baked Chicken Cutlets
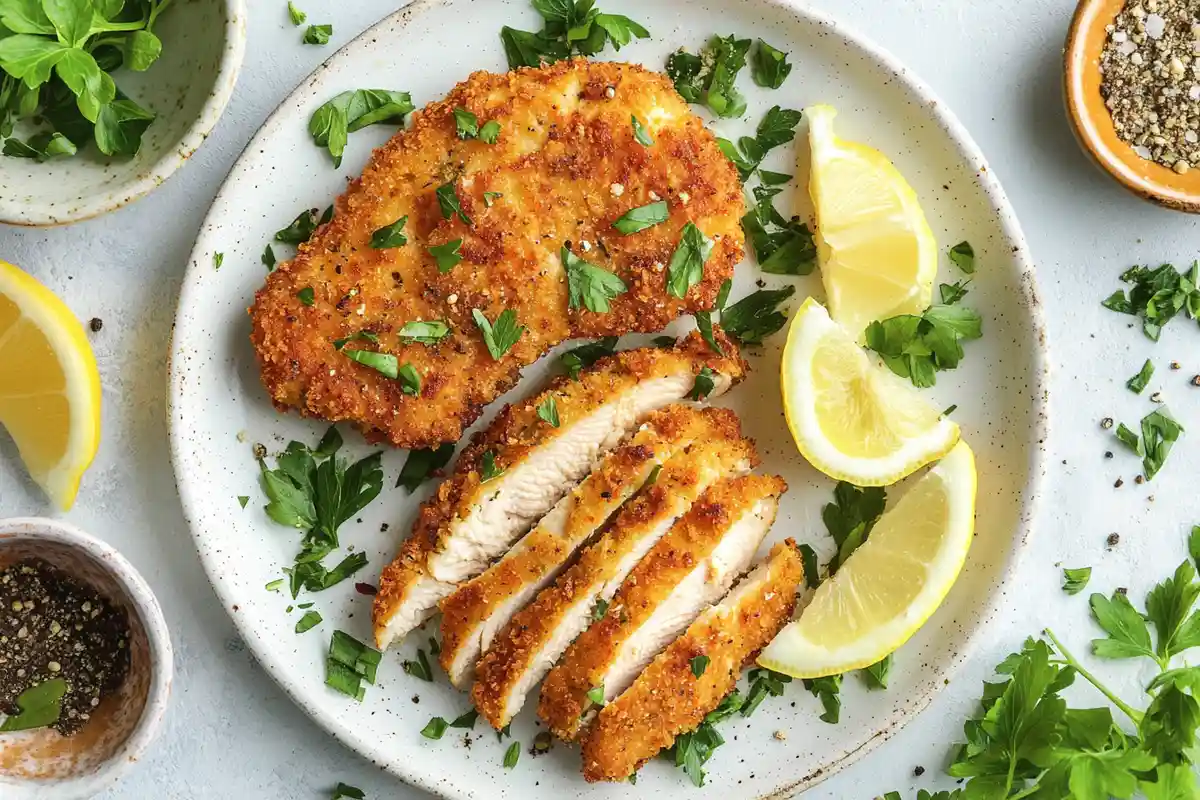
Who doesn’t love a dish that’s simple, flavorful, and guilt-free? Enter baked chicken cutlets. These golden, crispy delights strike the perfect balance between comfort food and a healthy meal. Whether you’re prepping for a family dinner, meal planning for the week, or trying to impress at a casual gathering, baked chicken cutlets fit the bill every single time.
In this article, you’ll learn everything about making perfect chicken cutlets in the oven—from choosing the best chicken to creating a crispy texture without frying. We’ll also dive into the cooking process, reheating tips, and delicious serving ideas. Stick around because we’ll answer some frequently asked questions about temperatures, baking times, and more. Let’s get started!
Table of Contents
What Are Baked Chicken Cutlets?
Baked chicken cutlets are thinly sliced chicken breasts seasoned and cooked in the oven until golden brown and crispy. Unlike fried chicken, these cutlets rely on baking to achieve that crunchy exterior without the extra calories and oil. Baking not only cuts down on unhealthy fats but also makes cleanup a breeze—who doesn’t appreciate that?
Why Choose Baked Chicken Cutlets?
There’s a lot to love about these oven-baked wonders. For one, they’re incredibly versatile—you can serve them as a standalone dish, layer them in a sandwich, or top them with marinara sauce for a classic chicken parmesan. Plus, baked chicken cutlets are:
- Healthier: By skipping the deep fryer, you get the same crunch with far fewer calories and saturated fats.
- Kid-Friendly: Even picky eaters love the crispy, tender texture.
- Customizable: Gluten-free, keto, or spiced to your liking, these cutlets cater to all dietary needs.
So whether you’re looking for a weeknight dinner or a quick meal prep solution, baked chicken cutlets might just become your go-to recipe.
Overview of This Article
In the sections below, we’ll guide you step-by-step through the preparation and baking process. You’ll learn how to choose the proper chicken, season it perfectly, and bake it to perfection. We’ll also share some serving tips and answer your most pressing questions about cooking chicken in the oven. Let’s jump right into part one: how to prepare the perfect chicken cutlets!
If you’re excited to try this recipe, don’t forget to explore more delicious options on ziarecipes.com! From soft Sourdough Dinner Rolls to hearty Lasagna Bolognese, creamy Italian Sausage Pasta, and savory Italian Sausage in the Oven, a world of flavors is waiting for you.
Preparing the Perfect Baked Chicken Cutlets
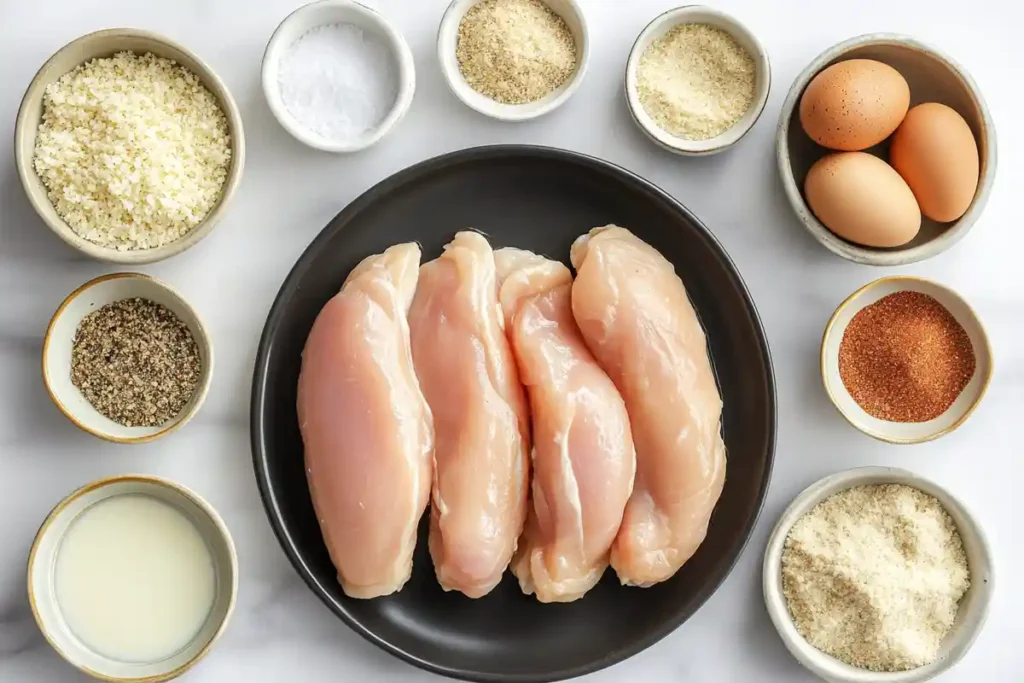
How to Choose the Right Ingredients for Baked Chicken Cutlets
Selecting the right ingredients is half the battle to achieve crispy, flavorful baked chicken cutlets. While the chicken is the star of the show, the supporting cast—breadcrumbs, seasonings, and a few other essentials—plays a crucial role in making your dish shine.
Chicken Selection: Fresh vs. Frozen
- Fresh Chicken: If possible, opt for fresh, unfrozen chicken for the best flavor and texture.
- Frozen Chicken: If using frozen chicken, ensure it’s fully thawed and patted dry to avoid excess moisture, which can prevent the coating from sticking.
Breadings and Coatings
The breadcrumb coating is what gives baked chicken cutlets their signature crunch. You can go with the classic or experiment with alternatives:
- Classic Breadcrumbs: Traditional store-bought or homemade breadcrumbs work well for a golden crust.
- Panko Breadcrumbs: These Japanese breadcrumbs are lighter and crispier, giving the cutlets extra texture.
- Gluten-Free Breadcrumbs: These are perfect for those with dietary restrictions. Brands like Ian’s or Aleia’s are excellent options.
- Almond Flour or Crushed Nuts: For a low-carb, keto-friendly twist, almond flour or finely ground nuts can replace traditional breadcrumbs.
Essential Add-Ons
- Grated Parmesan cheese for a savory, cheesy kick.
- Dried herbs such as oregano, thyme, or parsley elevate the flavor.
- Garlic powder and paprika for a subtle spice boost.
How to Slice Chicken into Perfect Cutlets
Uniformly thin chicken cutlets are key to even baking. Thick pieces can result in overcooked edges and undercooked centers, so preparation is vital.
Steps to Slice Chicken Like a Pro
- Start with a Sharp Knife: A sharp chef’s knife ensures clean cuts without tearing the meat.
- Freeze Slightly (Optional): Chill chicken breasts in the freezer for 15–20 minutes. This firms up the meat and makes slicing easier.
- Slice Horizontally: Place one hand flat on top of the chicken breast and carefully slice horizontally, creating two even pieces.
- Pound for Consistency: Place the sliced chicken between two sheets of plastic wrap or parchment paper. Use a meat mallet or rolling pin to pound each piece until it’s about ¼ inches thick.
Seasoning and Marinating Techniques
Once your chicken is prepped, it’s time to infuse flavor. While seasoning is quick and straightforward, marinating takes things up a notch by tenderizing the meat and adding depth to the taste.
Dry Seasoning Tips
If you’re short on time, a dry seasoning rub can still work wonders. Combine salt, black pepper, garlic powder, paprika, and a pinch of cayenne for a flavorful base. Sprinkle the mixture generously over both sides of the chicken.
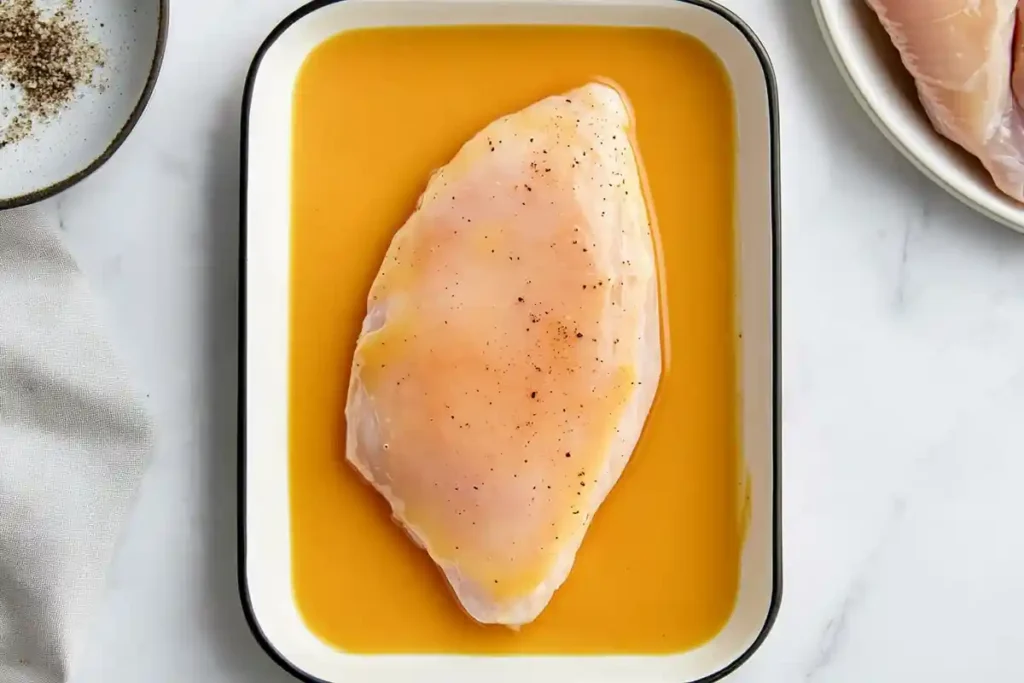
Marinating for Maximum Flavor
- Lemon Garlic Marinade: A classic combination of olive oil, fresh lemon juice, minced garlic, and dried oregano.
- Buttermilk Soak: Ideal for tender, juicy chicken. Buttermilk’s natural acidity breaks down proteins while adding a hint of tanginess.
- Yogurt-Based Marinade: Combine plain Greek yogurt, garlic, and smoked paprika for a rich, creamy flavor.
Let the chicken marinate for at least 30 minutes—though overnight marination yields even better results.
Breaded vs. Non-Breaded Chicken Cutlets
Before baking, decide whether you want a breaded or non-breaded version of your chicken cutlets. Both options have their unique charm:
Breaded Chicken Cutlets
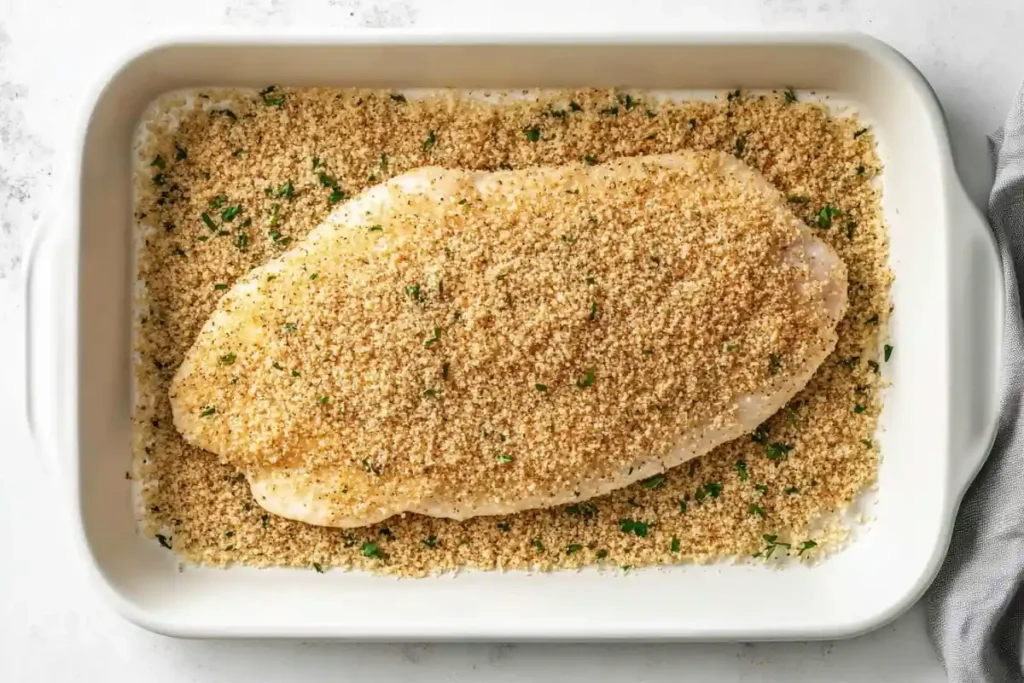
- Coating the chicken in breadcrumbs provides the classic crispy texture most people crave.
- To ensure a firm breading, use the three-step dredging method:
- Flour: Lightly coat each piece of chicken with all-purpose or gluten-free flour.
- Egg Wash: Dip the floured chicken into beaten eggs.
- Breadcrumbs: Press the chicken into your breadcrumb mixture, ensuring an even coating.
Non-Breaded Chicken Cutlets
For a lighter, carb-free version:
- Skip the flour and breadcrumbs together.
- Season the chicken generously with your favorite spices and drizzle with olive oil for a golden, flavorful crust.
Pro Tips for Prepping Like a Chef
Use Parchment Paper or a Wire Rack
When it’s time to bake, parchment paper prevents sticking and makes cleanup a breeze. Alternatively, place the chicken on a wire rack set over a baking sheet to allow heat to circulate underneath for even crispiness.
Preheat the Oven for Success
Always preheat your oven to the desired temperature—typically 400°F—for optimal results. An unpreheated oven can lead to uneven cooking and soggy breading, which nobody wants!
Baking the Chicken Cutlets to Perfection
What Temperature Is Best for Baking Chicken Cutlets?
Temperature plays a critical role in ensuring your baked chicken cutlets turn out juicy on the inside and crispy on the outside. But what’s the sweet spot? Most recipes recommend baking chicken at either 350°F or 400°F, depending on the desired results.
- 350°F: Baking at a lower temperature ensures the chicken cooks evenly, but it might not develop as much crispiness. This option works well if you prefer a softer, more tender texture.
- 400°F: Baking at a higher temperature is ideal for crispy, golden-brown cutlets. The heat helps seal in moisture while giving the coating a nice crunch.
Which Is Better?
For the best of both worlds—crispy and juicy—bake at 400°F. The higher temperature reduces cooking time, which minimizes the chance of drying out the chicken.
How to Bake Chicken Cutlets Step-by-Step
Ready to transform those prepped cutlets into a deliciously crispy dish? Follow these foolproof steps to bake your chicken cutlets like a pro.
Prepping the Baking Tray
- Line Your Tray: Place a sheet of parchment paper on a large baking sheet. It prevents sticking and makes cleanup easier.
- Add a Wire Rack (Optional): Elevating the chicken on a wire rack allows hot air to circulate underneath, creating an evenly crispy coating.
- Grease the Surface: Lightly spray the parchment paper or rack with nonstick cooking spray to ensure the breading stays intact.
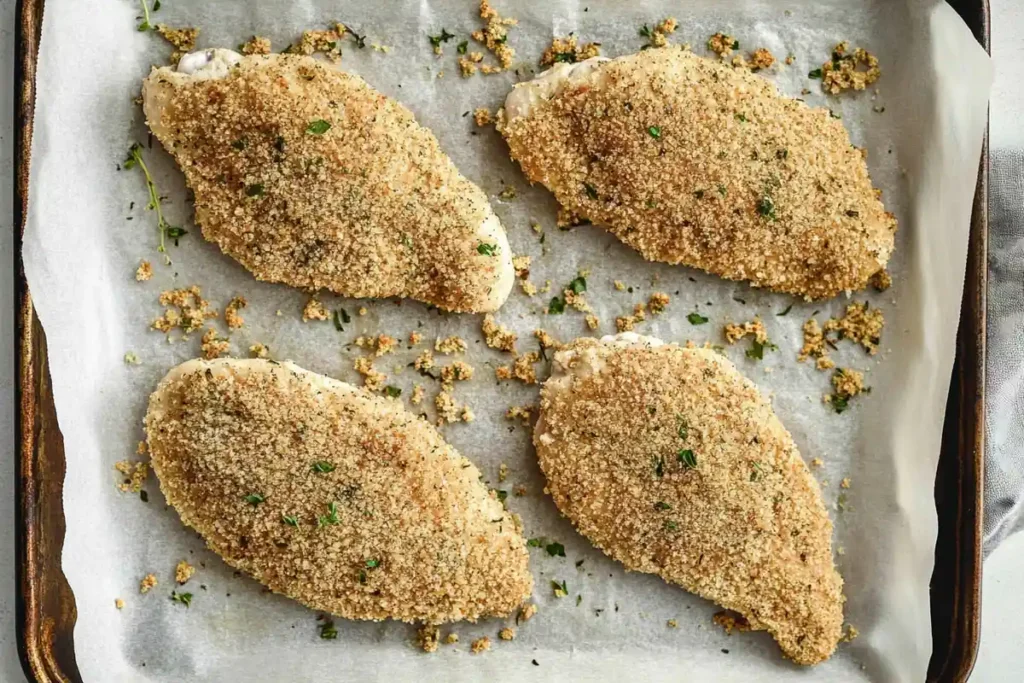
Arrange the Cutlets
Lay the chicken cutlets on the prepared tray or rack in a single layer. Make sure there’s space between each piece—crowding the tray can lead to uneven cooking.
Bake the Chicken
- Preheat your oven to 400°F (or 375°F for convection ovens).
- Bake the cutlets for 18–20 minutes. Thin cutlets may cook faster, so keep an eye on them after 15 minutes.
- If you’re using thicker cutlets, extend the baking time to 22–25 minutes, checking for doneness.
How Long Does It Take to Bake Thin Chicken Breasts at 400?
For thin chicken breasts or cutlets (about ¼ inch thick), 15–18 minutes is usually sufficient at 400°F. Always check the internal temperature with a meat thermometer to ensure it’s reached 165°F for food safety.
Should You Flip Breaded Chicken in the Oven?
It is a common question—and the answer depends on your preferences.
- Flipping Pros: Turning the chicken halfway through baking can help both sides develop a golden, crispy crust.
- Flipping Cons: If you’ve breaded the chicken heavily, flipping might disrupt the coating, leaving you with bare patches.
Expert Tip
If you’re baking on a wire rack, flipping isn’t necessary since the heat circulates evenly. For cutlets baked directly on a tray, gently flip them halfway through using a spatula or tongs to avoid damaging the coating.
How to Check If Chicken Cutlets Are Done
Don’t leave your baked chicken cutlets’ doneness up to guesswork! These tips will ensure they’re fully cooked without drying out.
Use an Instant-Read Thermometer
- Insert the thermometer into the thickest part of the chicken. The internal temperature should read 165°F.
- For accuracy, avoid touching the baking tray or bones with the thermometer tip.
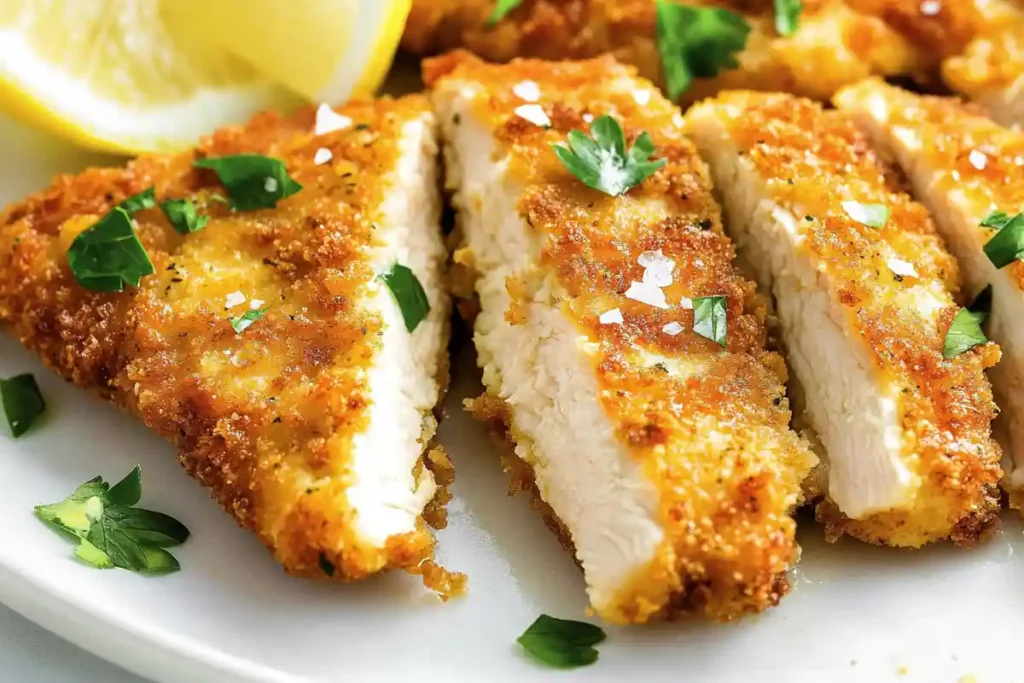
Visual Cues
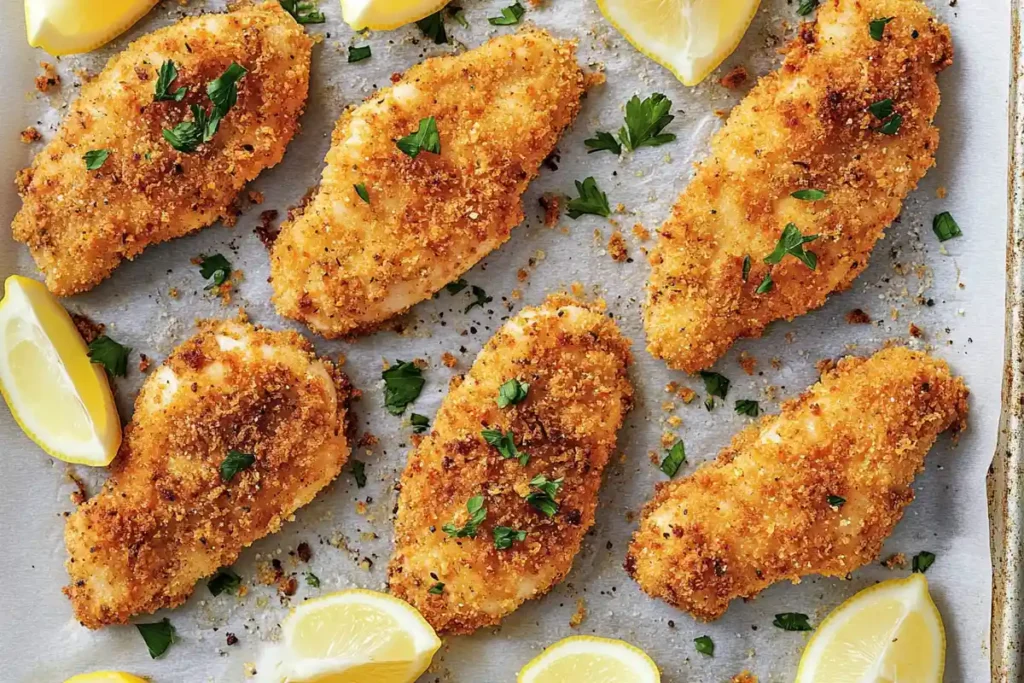
- The breading should be golden brown and crisp.
- When sliced, the chicken should appear white and juicy with no pink spots.
The Resting Rule
Once the chicken is done, let it rest on the tray for 5 minutes before serving. Resting allows the juices to be redistributed, keeping the meat tender and flavorful.
Bonus: Getting Extra Crispy Chicken
If you’re craving even more crunch, here’s a little secret: Finish your cutlets under the broiler for 1–2 minutes after baking. Watch closely to prevent burning, but this quick step adds an irresistible golden finish.
Serving and Storing Baked Chicken Cutlets
Creative Ways to Serve Baked Chicken Cutlets
Once your baked chicken cutlets are golden, crispy, and fresh out of the oven, the real fun begins—deciding how to serve them! These versatile cutlets pair beautifully with a variety of sides, sauces, and accompaniments, making them the perfect centerpiece for countless meals.
Classic Pairings
- Mashed Potatoes: Creamy, buttery mashed potatoes are a comforting match for crispy chicken.
- Steamed Vegetables: Keep it light with a medley of broccoli, carrots, and green beans. Drizzle with olive oil and a squeeze of lemon for extra flavor.
- Garden Salad: A fresh, crisp salad with leafy greens, cherry tomatoes, and balsamic vinaigrette balances the richness of the chicken.
Elevated Meal Ideas
- Chicken Parmesan: Top your baked cutlets with marinara sauce, a sprinkle of mozzarella, and Parmesan cheese. Pop them under the broiler until the cheese melts for a quick twist on this Italian classic.
- Chicken Sandwiches: Place a cutlet in a toasted bun with lettuce, tomato, and a dollop of mayo or honey mustard. It’s simple but oh-so-satisfying.
- Wraps or Tacos: Slice the chicken into strips and tuck it into tortillas with shredded lettuce, avocado, and a zesty sauce like chipotle mayo or tzatziki.
How to Store Leftovers
If you have leftovers, don’t worry—baked chicken cutlets store beautifully and can easily be reheated for a second meal. Proper storage is key to maintaining their crispy texture and juicy interior.
Refrigeration Tips
- Allow the chicken to cool completely before storing. Placing hot food in the fridge can create condensation, leading to soggy breading.
- Store cutlets in an airtight container or tightly in foil or plastic wrap. In the refrigerator, they’ll stay fresh for up to 3–4 days.
Freezing Baked Chicken Cutlets
- For more extended storage, freeze the cutlets individually to prevent them from sticking together.
- Use freezer-safe bags or containers, removing as much air as possible to avoid freezer burn.
- Frozen cutlets can last up to 3 months when stored properly.
What Temperature to Heat Up Chicken Cutlets in the Oven?
Reheating your chicken cutlets correctly ensures they stay crispy and don’t dry out. Microwaving can make the breading soggy, so your best bet is to use the oven.
Steps to Reheat Baked Chicken Cutlets
- Preheat your oven to 375°F.
- Place the cutlets on a baking sheet lined with parchment paper or foil.
- Heat the chicken for 10–15 minutes, flipping halfway through.
- Check the internal temperature—it should reach 165°F before serving.
Quick Tip for Crispy Leftovers
To restore that crunchy coating, consider reheating the chicken on a wire rack in the oven. It prevents the bottom from getting soft and keeps the entire cutlet crispy.
Serving Leftovers Creatively
Leftover baked chicken cutlets can be repurposed into entirely new dishes:
- Chicken Caesar Salad: Slice the cutlets and toss them with crisp romaine lettuce, croutons, and Caesar dressing.
- Pasta Topping: Cut the chicken into bite-sized pieces and add them to your favorite pasta dish with marinara or Alfredo sauce.
- Breakfast Option: Pair leftover cutlets with waffles or toast for a savory twist on chicken and waffles.
FAQs and Final Tips for Baked Chicken Cutlets
Frequently Asked Questions
Is it better to bake chicken at 350 or 400 in the oven?
It depends on your desired outcome. Baking at 400°F is ideal for crispy, golden cutlets, while 350°F ensures gentler, even cooking, perfect for juicier meat. If crispiness is your priority, 400°F is the better choice.
How long does it take to bake thin chicken breasts at 400?
Thin chicken breasts or cutlets (around ¼ inches thick) typically take 15–18 minutes to bake at 400°F. For safety, always check the internal temperature to ensure it reaches 165°F.
Should you flip the breaded chicken in the oven?
Flipping is optional. If you’re using a wire rack, there’s no need to flip, as heat circulates evenly. If baking directly on a tray, flipping halfway can help both sides achieve a golden crust, but do so carefully to avoid disrupting the breading.
What temperature to heat chicken cutlets in the oven?
Reheat cutlets at 375°F for 10–12 minutes. Use a wire rack to maintain crispiness and flip halfway through the process for even reheating.
Final Tips for Success Every Time
- Experiment with Seasonings: Try adding smoked paprika, lemon zest, or fresh herbs to switch up the flavors.
- Monitor Cooking Time: Keep an eye on the oven, especially when baking thinner cuts, to prevent overcooking.
- Don’t Skip Resting: Let the chicken rest for a few minutes after baking to lock in the juices.